
nezha探针(v1)安装
官网提供了一键脚本安装
国外服务器
curl -L https://raw.githubusercontent.com/nezhahq/scripts/refs/heads/main/install.sh -o nezha.sh && chmod +x nezha.sh && sudo ./nezha.sh
国内服务器
curl -L https://gitee.com/naibahq/scripts/raw/main/install.sh -o nezha.sh && chmod +x nezha.sh && sudo CN=true ./nezha.sh
脚本提供了docker安装和独立安装两种种方式
1.docker方式(需先自行安装docker服务和docker-compose):
请自行选择您的安装方式:
1. Docker
2. 独立安装
请输入选择 [1-2]:1  #选择安装方式
哪吒监控管理脚本
--- https://github.com/nezhahq/nezha ---
1.  安装面板端
2.  修改面板配置
3.  重启并更新面板
4.  查看面板日志
5.  卸载管理面板
————————————————-
6.  更新脚本
————————————————-
0.  退出脚本

请输入选择 [0-6]: 1 #安装面板
> 安装
> 修改配置
正在下载 Docker 脚本
请输入站点标题: zztt   #自定义站点标题
请输入暴露端口: (默认 8008)7777  #公开访问端口
请指定安装命令中预设的 nezha-agent 连接地址 (例如 example.com:443)103.189.141.150:7777 #配置客户端访问地址,有域名这样配置:zzyyoo.top:7777
是否希望通过 TLS 连接 Agent?(影响安装命令)[y/N]n   #生产环境建议选y
请指定后台语言
1. 中文(简体)
2. 中文(台灣)
3. English
请输入选项 [1-3]1 #选择中文,根据自己配置
Dashboard 配置 修改成功,请稍等 Dashboard 重启生效
> 重启并更新
[+] Pulling 7/7
 ✔ dashboard Pulled                                                                                      43.4s
   ✔ 995f0d0f50ce Pull complete                                                                           3.6s
   ✔ 35565e706135 Pull complete                                                                           3.7s
   ✔ d7c7b95bee54 Pull complete                                                                           3.7s
   ✔ 2385a404c413 Pull complete                                                                           3.8s
   ✔ 19360775fbd0 Pull complete                                                                           3.9s
   ✔ 89d356c1593f Pull complete                                                                          41.8s
[+] Running 2/2
 ✔ Network dashboard_default  Created                                                                     0.1s
 ✔ Container nezha-dashboard  Started                                                                     1.1s
哪吒监控 重启成功
默认地址:域名:站点访问端口上述显示已完成镜像的拉去并成功启动容器访问http:103.189.141.150:7777
初始化用户:admin密码:admin
请登录到后台-个人信息-更新密码!
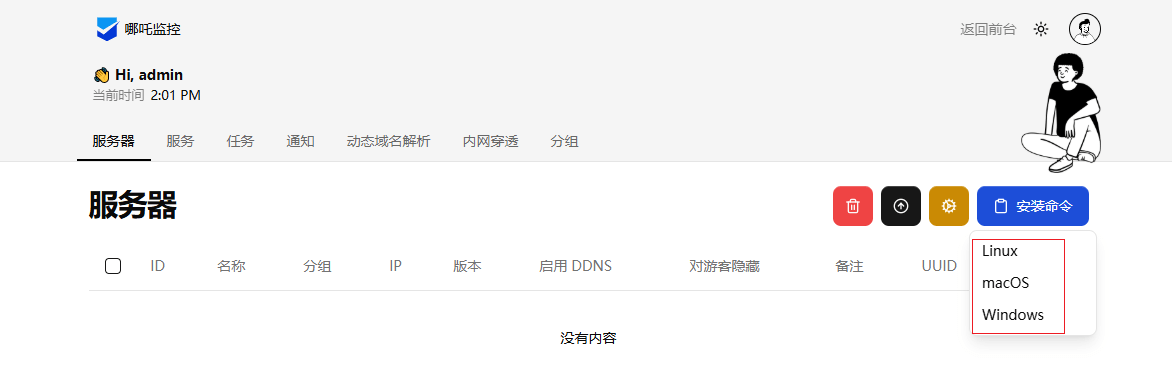
配置客户端,点击安装命令-选择被监控的主机的系统类型,会自动复制安装命令,粘贴到被监控主机下执行即可完成。
2.独立方式安装
请自行选择您的安装方式:
1. Docker
2. 独立安装
请输入选择 [1-2]:2
哪吒监控管理脚本
--- https://github.com/nezhahq/nezha ---
1.  安装面板端
2.  修改面板配置
3.  重启并更新面板
4.  查看面板日志
5.  卸载管理面板
————————————————-
6.  更新脚本
————————————————-
0.  退出脚本

请输入选择 [0-6]: 1
> 安装
> 修改配置
请输入站点标题: zztt
请输入暴露端口: (默认 8008)7777
请指定安装命令中预设的 nezha-agent 连接地址 (例如 example.com:443)103.189.141.150:7777  #配置客户端访问地址,有域名这样配置:zzyyoo.top:443
是否希望通过 TLS 连接 Agent?(影响安装命令)[y/N]n   #生产环境建议选y
请指定后台语言
1. 中文(简体)
2. 中文(台灣)
3. English
请输入选项 [1-3]1
正在下载服务文件
Dashboard 配置 修改成功,请稍等 Dashboard 重启生效
> 重启并更新
当前最新版本为: v1.12.4
Created symlink /etc/systemd/system/multi-user.target.wants/nezha-dashboard.service → /etc/systemd/system/nezha-dashboard.service.
哪吒监控 重启成功
默认地址:域名:站点访问端口上述显示已完成镜像的拉去并成功启动容器访问http:103.189.141.150:7777
初始化用户:admin密码:admin
请登录到后台-个人信息-更新密码!
配置客户端,点击安装命令-选择被监控的主机的系统类型,会自动复制安装命令,粘贴到被监控主机下执行即可完成。
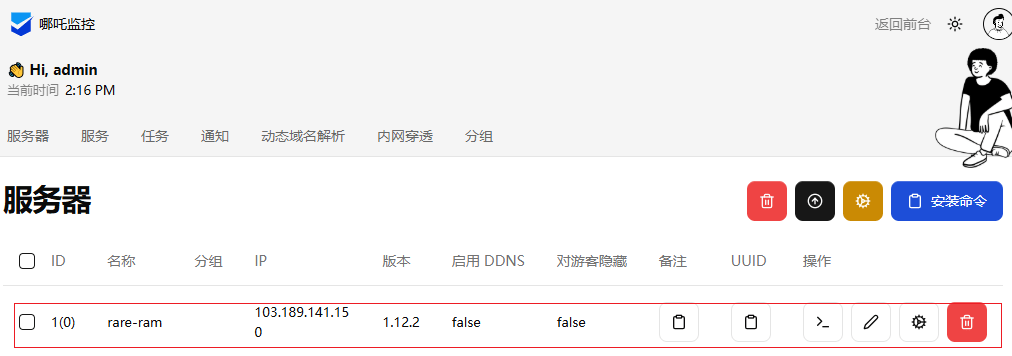
显示已成功监控主机
安全设置
修改客户端/opt/nezha/agent/config.yml文件
client_secret: jgXD2pu5uggTFCNbEmpa0iSldVrqMUNF
debug: false
disable_auto_update: false
disable_command_execute: false  #改true禁止服务端通过ssh访问主机
disable_force_update: false
disable_nat: false         #改true禁止服务端下达的内网穿透任务
disable_send_query: false
gpu: false
insecure_tls: false
ip_report_period: 1800
report_delay: 3
self_update_period: 0
server: 103.189.141.150:7777
skip_connection_count: false
skip_procs_count: false
temperature: false
tls: false
use_gitee_to_upgrade: false
use_ipv6_country_code: false
uuid: 78be6a0a-46f5-5ff5-1f94-6fb2940f3a29
重启客户端
sudo systemctl daemon-reload
sudo systemctl start nezha-agent
配置nginx
vim nezha.conf
#输入以下配置

server {
    listen 443 ssl http2;
    listen [::]:443 ssl http2;
    # http2 on; # Nginx > 1.25.1,请注释上面两行,启用此行

    server_name nezha.zzyyoo.top; # 替换为你的域名
    ssl_certificate          /opt/nezha.zzyyoo.top.pem; # 域名证书路径
    ssl_certificate_key      /opt/nezha.zzyyoo.top.key;       # 域名私钥路径
    ssl_protocols TLSv1.2 TLSv1.3;
    underscores_in_headers on;

    # grpc 相关
    location ^~ /proto.NezhaService/ {
        grpc_set_header Host $host;
        grpc_set_header nz-realip $remote_addr;
        grpc_read_timeout 600s;
        grpc_send_timeout 600s;
        grpc_socket_keepalive on;
        client_max_body_size 10m;
        grpc_buffer_size 4m;
        grpc_pass grpc://dashboard;
    }
    # websocket 相关
    location ~* ^/api/v1/ws/(server|terminal|file)(.*)$ {
        proxy_set_header Host $host;
        proxy_set_header nz-realip $remote_addr;
        proxy_set_header Origin https://$host;
        proxy_set_header Upgrade $http_upgrade;
        proxy_set_header Connection "upgrade";
        proxy_read_timeout 3600s;
        proxy_send_timeout 3600s;
        proxy_pass http://127.0.0.1:8008;
    }
    # web
    location / {
        proxy_set_header Host $host;
        proxy_set_header nz-realip $remote_addr;
        proxy_read_timeout 3600s;
        proxy_send_timeout 3600s;
        proxy_buffer_size 128k;
        proxy_buffers 4 256k;
        proxy_busy_buffers_size 256k;
        proxy_max_temp_file_size 0;
        proxy_set_header X-Forwarded-Proto $scheme;
        proxy_pass http://127.0.0.1:8008;
    }
}

upstream dashboard {
    server 127.0.0.1:8008;
    keepalive 512;
}
重启nginx即可。
本文是原创文章,采用 CC BY-NC-ND 4.0 协议,完整转载请注明来自 zy
评论
匿名评论
隐私政策
你无需删除空行,直接评论以获取最佳展示效果
